
OSRS Fire Cape Guide: How to Defeat TzTok-Jad and Claim One of RuneScape’s Hardest Rewards

Are you struggling to earn your first Fire Cape in Old School RuneScape, or wondering why TzTok-Jad is considered one of the most punishing bosses in the game? What gear should you bring? How do you survive the Inferno-style waves? And what mistakes cause most players to fail at the final fight?

This OSRS Fire Cape guide breaks everything down step by step-from preparation and recommended setups to Jad mechanics and survival strategies-so you can finally secure this iconic achievement. Whether you’re a mid-level player or a veteran returning for a new attempt, this guide will help you succeed. To speed up your journey, consider purchasing coins at RSorder to level up your game and prepare more effectively for high-level PvE challenges.

What Is the Fire Cape and Why It Matters

Key Takeaway: The Fire Cape is one of OSRS’s most respected combat achievements.

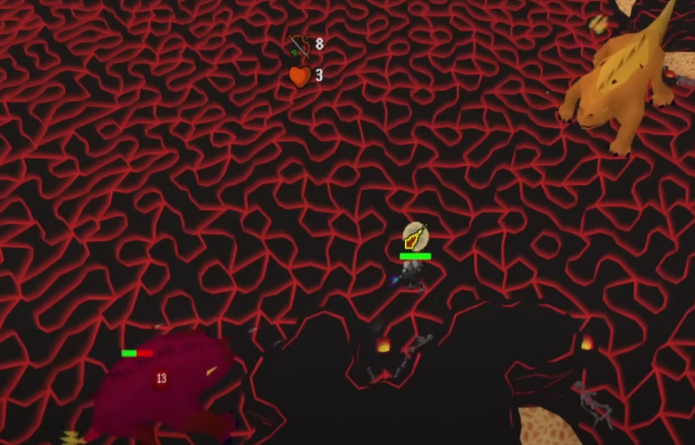
The Fire Cape is awarded for completing the TzHaar Fight Cave and defeating TzTok-Jad. It is widely recognized as a skill milestone in Old School RuneScape due to the mechanics-heavy nature of the encounter.

Benefits of earning the Fire Cape include:

·Strong melee bonuses

·High prestige among players

·Essential PvM progression item

·Proof of advanced combat skill

Many players also use OSRS gold to upgrade their gear before attempting the Fight Cave, as better equipment significantly increases survival chances during later waves.

Recommended Gear and Inventory Setup

Key Takeaway: Proper preparation dramatically increases your success rate.

Your loadout can make or break your Fire Cape attempt. Since the Fight Cave scales in difficulty, balancing offense, defense, and sustain is critical.

Recommended setup includes:

·High ranged defense armor (Karil’s or equivalent)

·Blowpipe or strong ranged weapon

·Amulet of Fury or similar combat amulet

·Prayer potions (essential for survival)

·High-healing food (sharks, brews, or better)

Inventory should prioritize:

·Prayer restoration

·Healing supplies

·Emergency backup gear if needed

A well-prepared inventory reduces stress and allows players to focus on mechanics rather than survival panic.

Fight Cave Waves: Surviving the Grind

Key Takeaway: Learning wave patterns prevents unnecessary damage.

The Fight Cave consists of multiple waves of increasing difficulty. Each wave introduces stronger enemies and more complex positioning challenges.

Key survival tips:

·Always prioritize healers and ranged threats

·Use safe spots whenever possible

·Control enemy aggro before advancing

·Conserve prayer for later waves

Efficiency is crucial-players who rush often find themselves overwhelmed by stacked enemy damage.

TzTok-Jad Mechanics Explained

Key Takeaway: Jad’s attack recognition is the most important skill check.

TzTok-Jad is the final boss and the reason most players fail their Fire Cape attempts. His mechanics are simple but deadly.

He uses two primary attacks:

·Ranged attack (rock fall animation)

·Magic attack (fireball projectile)

The key is reacting instantly based on animation cues:

·Protect from Missiles for ranged

·Protect from Magic for fireballs

A single mistake can result in instant death, making focus and calm execution essential.

Preparing for Success with Better Gear

Key Takeaway: Stronger gear makes the Fight Cave significantly easier.

While skill is the most important factor, gear still plays a huge role in reducing difficulty. Upgraded ranged weapons and defensive armor help clear waves faster and conserve resources for Jad.

Many players invest buy OSRS gold strategies to acquire better gear faster, ensuring they are fully prepared before entering the Fight Cave.

Efficient preparation often turns a difficult run into a manageable challenge.

Advanced Tips for First-Time Fire Cape Success

Key Takeaway: Small mistakes are the main cause of failure-focus matters more than speed.

·Stay calm during Jad fight-panic leads to mistakes

·Use audio cues to anticipate attacks

·Practice prayer switching before entering

·Take breaks between waves if needed

·Learn safe spots for difficult wave combinations

·Always bring extra prayer potions

·Do not rush final waves

Consistency and patience are more important than aggressive gameplay.

Final Thoughts

Earning the Fire Cape in Old School RuneScape is a major milestone that tests patience, preparation, and mechanical skill. By understanding Fight Cave waves, optimizing your gear, and mastering Jad’s attack patterns, you can dramatically increase your chances of success. Whether you’re attempting it for the first time or returning for another run, preparation is everything. For players looking to speed up their progression and improve their setup, purchasing coins at RSorder can help you acquire stronger gear and take on this challenge with greater confidence.

Continue Reading

Diablo 4 Guide: How to Get Anathema of the Primes Fast

Anathema of the Primes is a powerful unique two-handed sword exclusive to Diablo 4’s endgame meta. This iconic weapon boasts exceptional damage stats and unique affixes that greatly boost crowd control and boss damage output. It is a top-tier gear choice for many melee and hybrid builds, making it highly sought after by endgame players.

Unlike common random-drop unique items, Anathema of the Primes has fixed drop sources. Blind open-world farming wastes massive time and resources. Mastering targeted farming methods is the key to obtaining this Diablo 4 Items in the shortest time possible.

Understand the Core Drop Source

Currently, the only reliable boss that drops Anathema of the Primes is Echo of Andariel. All other in-game activities only offer extremely low drop chances, which are not worthy of dedicated farming. Echo of Andariel resides in Hanged Man’s Hall in Kehjistan, serving as the primary target for all fast-farm strategies.

A critical rule for drops is the difficulty threshold. This unique sword only drops on Torment 1 or higher difficulty. Lower world tiers and difficulty modes have zero drop rate, so players must unlock and enter Torment difficulty before starting their farming journey.

Farm Greater Lair Keys Efficiently

Challenging Echo of Andariel and looting her treasure hoard requires a Greater Lair Key. This key is the core prerequisite for repeated Andariel runs, so efficient key farming directly speeds up weapon acquisition.

Greater Lair Keys drop from lesser endgame lair bosses, including Lord Zir, Grigoire, and the Beast in Ice. Players can farm these bosses in rotation to steadily accumulate keys. To further boost key drop rates, push difficulty to Torment 6 or higher. Higher Torment tiers significantly increase rare key drop chances without excessive difficulty spikes for well-built characters.

Avoid farming on low Torment tiers. The sparse key drops will drastically slow down your overall farming progress. Always balance your build’s survivability and difficulty to maintain consistent run speeds.

Optimize Echo of Andariel Runs

Once you have a stock of Greater Lair Keys, focus on streamlined Echo of Andariel runs. Build a fast, burst-oriented character setup to clear the boss within seconds. High movement speed and single-target damage are essential to cut down run time.

Skip unnecessary trash mobs in Hanged Man’s Hall. Head straight to the boss arena to trigger the fight. After defeating Andariel, use the Greater Lair Key to open her treasure hoard, which holds the highest chance of dropping Anathema of the Primes.

Alternative Supplemental Farming Methods

For players waiting for key respawns or wanting extra drop chances, Helltide Events are a great supplemental option. Active every hour, Helltides let players collect Aberrant Cinders to open premium chests. Though the drop rate is lower than Andariel runs, it adds extra chances without extra key costs.

The Horadric Cube system also offers a backup method. Players can craft and reforge rare two-handed swords through the cube. While not guaranteed, this method lets players utilize cheap Diablo 4 materials to chase the unique sword passively.

Final Fast-Farm Tips

Prioritize Torment 6+ Andariel runs as your main farming loop. Stock up 10 to 20 Greater Lair Keys in advance to avoid frequent key farming interruptions. Optimize your build for speed and burst damage to maximize daily run counts.

Avoid random dungeon and open-world farming. Sticking to targeted boss fights and supplemental Helltide activities is the fastest and most efficient way to secure Anathema of the Primes in Diablo 4’s endgame.

Continue Reading

All Diablo 4 Affix Categories and How Tuning Prism Crafts Work

Crafting in Diablo 4 Season 13 has become far more advanced thanks to the introduction of the Horadric Cube and Tuning Prism systems. Instead of relying entirely on random drops, players can now manipulate gear affixes more strategically by targeting specific stat categories during crafting. Understanding affix categories is now one of the most important parts of optimizing endgame builds, especially for players pushing higher Torment difficulties and maximizing powerful Diablo 4 Items.

However, many players still misunderstand how affix categories actually work. The names of stats can often be misleading, and using the wrong Tuning Prism can easily waste expensive crafting materials. Since crafting costs continue increasing in Season 13, efficient players are becoming much more careful about resource management. Some even choose to buy D4 materials so they can focus more on build optimization and less on repetitive farming.

This guide explains every major affix category in Diablo 4 and how Tuning Prism crafting works in the current meta.

What Are Affix Categories in Diablo 4?

Affix categories are stat groupings used by the Horadric Cube crafting system. Each affix belongs to a specific category, and Tuning Prisms interact with these categories during rerolls and affix manipulation.

The main categories include:

·Offensive

·Defensive

·Utility

·Resource

·Mobility

Some affixes also fall into specialized subcategories like skill affixes or core-stat targeting. Understanding which stats belong to which category is critical because the Cube recipes use category rules to determine what gets rerolled or modified.

Offensive Affix Category

Offensive affixes focus on increasing damage output and combat effectiveness. These are some of the most valuable stats for endgame builds because they directly improve clear speed and boss damage.

Common Offensive affixes include:

·Critical Strike Chance

·Critical Strike Damage

·Vulnerable Damage

·Attack Speed

·Damage Over Time

·Weapon Damage

·Elemental Damage Multipliers

·Thorns

·Core Stat bonuses like Strength or Intelligence

Many players target Offensive affixes when crafting weapons, gloves, rings, and amulets. These stats are especially important for builds like:

·Rapid Fire Rogue

·Whirlwind Barbarian

·Chain Lightning Sorcerer

·Minion Necromancer

Optimizing offensive Diablo 4 Items often requires repeated rerolls and expensive crafting attempts, which is why crafting resources are now considered one of the most valuable currencies in the game.

Defensive Affix Category

Defensive affixes focus on survivability and mitigation.

These include:

·Armor

·Damage Reduction

·Maximum Life

·Dodge Chance

·Life Regen

·Life on Hit

·Elemental Resistances

·All Resistance bonuses

As Torment scaling becomes more dangerous in Season 13, defensive stats have become increasingly important. High-end builds can no longer rely entirely on raw damage output. Players now balance survivability and offense much more carefully than in previous seasons.

Many players specifically craft defensive affixes onto:

·Chest armor

·Pants

·Helms

·Shields

This allows builds to survive elite affixes, boss mechanics, and high-tier dungeon encounters more consistently.

Utility Affix Category

Utility affixes support overall build consistency and gameplay quality.

This category includes:

·Cooldown Reduction

·Lucky Hit Chance

·Potion Capacity

·Healing Received

·Fortify Generation

·Skill Rank bonuses

·Impairment Reduction

Cooldown Reduction remains one of the strongest utility stats in Diablo 4 because it dramatically improves skill uptime for many meta builds.

Players crafting Utility-focused Diablo 4 Items often prioritize:

·Amulets

·Helms

·Gloves

These slots commonly roll valuable cooldown and skill-enhancing affixes.

Community discussions also note that some Utility affixes behave inconsistently during crafting, especially Fortify Generation and Impairment Reduction. Several Reddit users recommend testing rerolls on lower-value items before risking expensive endgame gear.

Resource Affix Category

Resource affixes help maintain skill usage and improve resource sustainability.

Common Resource affixes include:

·Resource Generation

·Resource Cost Reduction

·Maximum Resource

·Lucky Hit Restore Resource

·Resource per Kill

These affixes are especially valuable for:

·Sorcerers

·Rogues

·Spiritborn builds

·Core-skill spam setups

Resource management became even more important after Season 13 balance changes increased the importance of sustained damage output during longer boss fights.

Many players now prioritize resource affixes on rings and amulets to maintain smooth gameplay loops.

Mobility Affix Category

Mobility affixes focus on movement speed and evade mechanics.

This category includes:

·Movement Speed

·Evade Cooldown Reduction

·Additional Evade Charges

·Evade Movement bonuses

Mobility stats are often underestimated, but they dramatically improve:

·Dungeon clear speed

·Helltide farming

·Boss positioning

·Seasonal efficiency

Fast farming builds frequently invest heavily into movement speed because faster clears generate more Diablo 4 Items, gold, and crafting materials per hour.

How Tuning Prisms Work

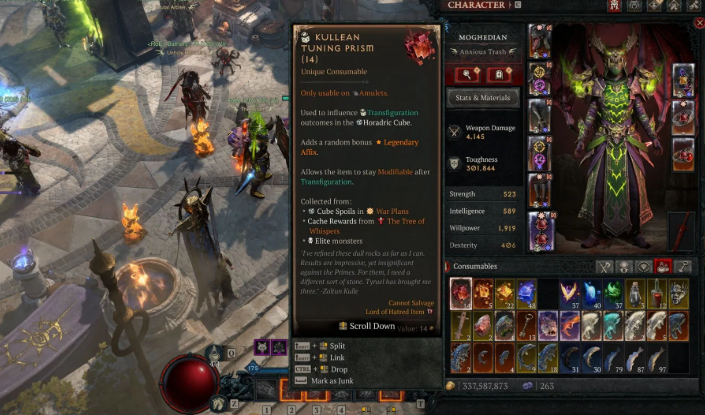
Tuning Prisms interact with affix categories during Horadric Cube crafting. Different prism types influence different categories of stats.

For example:

·Offensive prisms target damage-related affixes

·Defensive prisms target survivability stats

·Utility prisms target cooldowns and support bonuses

The important detail is that the Cube recipe itself determines how the prism behaves.

According to community testing:

·Focused Rerolls replace an affix with another from the same category

·Chaotic Rerolls remove a targeted category affix and replace it with a random category stat

This distinction is extremely important because misunderstanding the recipe can ruin valuable gear.

Why Crafting Materials Matter More Than Ever

The Horadric Cube system is powerful, but it is also expensive.

Players now spend huge amounts of:

·Gold

·Forgotten Souls

·Legendary crafting components

·Tuning Prisms

·Endgame reagents

Perfectly optimizing Diablo 4 Items can require dozens or even hundreds of rerolls.

Because of these costs, many players choose to buy D4 materials to speed up crafting and reduce repetitive farming time. This allows them to focus more heavily on pushing endgame content and experimenting with new builds.

Best Items to Craft With Tuning Prisms

The best crafting targets are usually:

·Amulets

·Rings

·Gloves

·Weapons

These slots have the highest impact on build performance because they can roll multiple high-value affixes simultaneously.

Players should avoid wasting expensive prisms on weak or temporary gear. Most veteran players recommend saving advanced crafting resources for:

·Greater Affix items

·Mythic Uniques

·High-item-power Ancestral gear

Final Thoughts

Affix categories are now one of the core systems driving Diablo 4’s endgame crafting. Understanding how Offensive, Defensive, Utility, Resource, and Mobility affixes interact with Tuning Prism recipes is essential for optimizing gear efficiently.

Continue Reading

Path of Exile 3.28: Ultimate Guide to the Latest Skill and Support Gems

The 3.28 “Mirage” league introduces one of the most ambitious gem expansions the game has seen in years. With brand-new skill gems, creative transfigured variants, and an entirely new tier of support gems, this update significantly reshapes how builds are designed and scaled into endgame.

Rather than simply adding power, these gems open up fresh mechanics and interactions—giving players more freedom to experiment and refine their playstyle.

New Skill Gems in Patch 3.28

This expansion adds a mix of entirely new abilities alongside additional Transfigured Skill Gems. Many of these lean into divine and elemental themes, offering both visual spectacle and mechanical depth.Don’t let a currency shortage hold you back—get your POE currency at MMOexp now and thrive!

Holy-Themed Abilities

A standout addition in Mirage is a set of holy-based skills that emphasize area damage, defensive interactions, and melee synergy.

Some highlights include:

Divine Blast (Str/Int): Fires a radiant beam that erupts into an outward explosion, making it strong for clearing clustered enemies.

Holy Hammers (Str/Int): Slams the ground to summon waves of descending hammers, with scaling tied to Power Charges for extended impact.

Holy Strike (Str/Int): Attacks summon spectral allies that assist in combat, adding persistent offensive pressure.

Shield of Light (Str/Int): Converts defensive blocks into sweeping cone attacks, blending offense with survivability.

These skills are especially appealing for players who favor melee hybrids, defensive playstyles, or party-oriented builds.

Expanded Transfigured Skill Gems

Transfigured gems continue to evolve in 3.28, offering alternate versions of familiar abilities that dramatically change how they function.

Notable examples include:

Shockwave Totem of Authority: Places a totem that emits repeated seismic bursts.

Static Strike of Gathering Lightning: Stores energy that releases chaining lightning effects during combat.

Charged Dash of Projection: Creates a controllable path that deals damage along its trajectory.

Flamethrower Trap of Stability: Deploys traps that emit sustained flames in multiple directions.

Kinetic Fusillade of Detonation: Generates hovering projectiles that detonate after a delay.

Orb of Storms of Squalls: Mobile storm orbs that reposition while striking enemies.

Shock Nova of Procession: Expands layered rings of lightning for overlapping damage zones.

Storm Burst of Repulsion: Channels energy orbs that explode when released.

Siphoning Trap of Pain: Applies chilling beams that deal damage over time.

These variants encourage players to revisit older skills with a new perspective, often unlocking entirely different build paths.

Exceptional Support Gems

One of the biggest system changes in 3.28 is the introduction of Exceptional Support Gems. Unlike traditional supports that mainly boost numbers, these focus on altering behavior and adding mechanics.

Examples include:

Greater Multistrike Support: Enhances repeated melee attacks with improved targeting behavior.

Hextoad Support: Modifies curse interactions in unique ways.

Bloodsoaked Banner Support: Strengthens banner mechanics, particularly in group play.

Eclipse Support: Introduces new interactions across multiple skill types.

Hiveborn Support: Expands the utility of offering-based builds.

With dozens of these supports available, players can reshape classic builds or create entirely new archetypes.

Impact on Build Diversity

The combined effect of these additions is a noticeable shift toward flexibility and experimentation.

Melee and Hybrid Builds: Holy-themed skills and lightning-based variants offer strong scaling and versatility.

Trap and Totem Playstyles: New transfigured options provide fresh tools for indirect damage builds.

Support Synergies: Exceptional supports enable interactions that previously didn’t exist, breathing life into niche setups.

As a result, both leveling strategies and endgame builds are likely to evolve quickly as players discover optimal combinations.

Patch 3.28 stands out as a major step forward for build customization. By introducing new skill archetypes, reinventing existing abilities, and expanding support mechanics, Mirage creates a deeper and more flexible system for character progression.Unlock infinite possibilities by harnessing the power of cheap POE currency from MMOexp!

For both experienced players and newcomers, this league offers plenty of room to experiment, optimize, and push creative builds further than before.

Continue Reading

ARC Raiders: How to Find ARC Synthetic Resin

In ARC Raiders, ARC Synthetic Resin is more than just a rare loot item-it’s a critical component for progressing late-game projects, crafting high-tier gear, and unlocking exclusive rewards. Once overlooked, this rare polymer has become a progression bottleneck for many players, especially with the introduction of the Arc Trophy Display project, which requires multiple units to complete. Whether you’re a new player just starting to scavenge the Topside or a veteran looking to farm efficiently, this guide breaks down the most reliable ways to find ARC Synthetic Resin, along with tips to maximize your yields.

What Is ARC Synthetic Resin?

Before diving into farming methods, it’s important to understand why ARC Synthetic Resin matters. Classified as a rare recyclable item, this high-strength polymer is derived from advanced ARC manufacturing processes, boasting extreme durability and flexible reinforcement properties. It weighs 1kg per unit, stacks up to 3, and can be sold for 1,000 ARC Raiders Coins or recycled into plastic parts-though recycling during a raid only returns 50% of components; full recycling is available in Speranza.

Its true value lies in progression: it’s a required donation for the Arc Trophy Display project (needing 10 units to unlock rewards like the Level 4 Bobcat SMG) and is used for crafting late-game armor layers, weapon housings, and structural upgrades. With its growing importance, knowing how to farm it efficiently is key to advancing in ARC Raiders.

The Safest Method: Farming Baron Husks

For players seeking low-risk, consistent yields, Baron Husks are the ideal target. These are dormant ARC machines that do not patrol or attack unless activated, making them perfect for solo players or those looking to avoid intense combat.

Baron Husks commonly spawn on maps like Dam Battlegrounds, Blue Gate, and Spaceport, and they are even more abundant during the Husk Graveyard map condition-which scatters additional first-wave husks across the map, boosting your chances of finding resin. They can also be found in greater numbers during Electromagnetic Storm conditions, especially on the Blue Gate map.

To loot a Baron Husk, simply approach the dormant machine, climb on top, and initiate the breach interaction. After the breach completes, roll away immediately- the husk’s head will ignite briefly before cooling down, allowing you to safely collect its loot, which often includes ARC Synthetic Resin. This method is risk-free and requires no combat, making it ideal for new players.

ARC Probes: Easy, Non-Threatening Loot Sources

Another reliable way to find ARC Synthetic Resin is by looting ARC Probes. These small, non-threatening machines land momentarily on the Topside (excluding the Stella Montis map) and emit a distinct beeping sound, making them easy to detect within a certain radius.

ARC Probes are perfect for quick, low-effort loot runs. They can be breached and looted instantly, with no combat required. To maximize your chances, look for the Prospective Probe map condition, which increases the spawn rate of ARC Probes across the map. The Blue Gate map, especially during an Electromagnetic Storm, also boosts the frequency of both active and broken-down ARC Probes, further increasing your resin yields.

Looting ARC Enemies: Higher Risk, Higher Rewards

For players comfortable with combat, looting ARC enemies is a viable way to farm ARC Synthetic Resin. Most large ARC enemies have a chance to drop this rare material, though some are more reliable than others.

Shredders are a standout choice: they are easier to defeat than larger bosses and consistently drop ARC Synthetic Resin. Found primarily on Stella Montis, Shredders can be taken down with 3 Snap Blast grenades (stuck to their body) or Light Impact grenades thrown at their thruster base. They are most commonly found in Medical Research, Cultural Archives, and the Lobby areas of the map, making them easy to locate.

Larger ARC enemies like Matriarchs, Queens, and Sentinels also drop resin, but they come with higher risk. These bosses require more firepower and coordination to defeat, but they often yield multiple rare items, including resin. New players can join PvE-focused lobbies to team up with other players, as many focus on the bosses’ cores, leaving the resin and other components up for grabs.

Avoid focusing on smaller ARC enemies like Wasps, Turrets, Snitches, and Spotters. While they may occasionally drop resin, their drop rates are extremely low, making them inefficient farming targets.

Maximizing Yields with Map Conditions

Map conditions play a crucial role in increasing your chances of finding ARC Synthetic Resin. Certain conditions boost the spawn rate of key targets, making your farming runs far more efficient.

The Husk Graveyard condition is ideal for farming Baron Husks, as it scatters more first-wave husks across the map. The Prospective Probe condition increases ARC Probe spawns, while Electromagnetic Storm boosts both ARC Probes and Baron Husks, especially on the Blue Gate map.

Other major map conditions like Night Raid, Harvester, and Locked Gate (Blue Gate) can also improve loot quality, increasing the chance of rare drops like ARC Synthetic Resin. Keep an eye on the map conditions before dropping in to plan your farming strategy accordingly.

Final Tips for Efficient Farming

To make the most of your time farming ARC Synthetic Resin, keep these tips in mind: Always carry enough inventory space-resin stacks up to 3, so avoid overloading your inventory with cheap ARCR Items. Use the Safe Pocket feature to protect your resin from being lost if you die during a raid.

If you’re a new player, start with Baron Husks and ARC Probes to build up your resin supply without risking combat. For veterans, team up with other players to take down larger ARC bosses like Matriarchs and Queens for higher yields. Finally, avoid recycling resin during raids-wait until you’re in Speranza to get the full 100% return on plastic parts if you don’t need the resin for progression.

With these methods, you’ll be able to farm ARC Synthetic Resin efficiently, progress through late-game projects, and unlock the rewards you need to thrive on the Topside. Whether you prefer safe, low-effort runs or high-risk, high-reward combat, ARC Raiders offers plenty of ways to track down this valuable material.

Continue Reading
1 2 3 … 22